To powder coat at home, you need a powder gun with clean, dry compressed air, a dedicated electric curing oven, prep tools like a blast cabinet, masking supplies and hooks, and safety gear. Never cure in a kitchen oven. Most standard powders cure at 375 to 400°F for 10 to 15 minutes once the part reaches temperature.
Key Takeaways:
- A home powder coating setup has five parts: gun, air supply, oven, prep and masking tools, and safety gear.
- The oven is where many home setups fail. Use a dedicated electric curing oven, never the one you cook in.
- For hobby applications, a small compressor generally works fine for spraying powder, as long as the air is dry and oil-free.
- Clean, blasted metal holds a coating far better than wiped metal. Prep decides how long the finish lasts.
- Powder is a combustible dust, so ventilation, a respirator and a fire extinguisher are non-negotiable.
You've seen the finish on a wheel, a bike frame or a set of brackets and thought, "I could do that in my own garage." You can. Plenty of hobbyists across the USA do exactly that, and the learning curve is shorter than most people expect.
The catch is equipment. Buy the wrong oven or skip the prep tools and you'll end up with orange peel, flaking, and a garage full of wasted powder. So what do you need, and what can you skip?
This guide walks through the gear, in the order you'll use it. If you want the full catalog while you read, browse our powder coating equipment and supplies.
What is powder coating?
Powder coating is a finishing process where dry, electrostatically charged powder is sprayed onto a grounded metal part, then heated in an oven until it melts, flows, and hardens into a tough skin. No solvents, no drips. The cured finish resists chips, scratches, and corrosion better than most wet paint, which is why it's popular on wheels, frames, tools, and outdoor furniture.
The Equipment List at a Glance
Here's the short version. Every item below earns its place.
Stage
|
What you need
|
Why it matters
|
Prep
|
Blast cabinet or portable blaster, degreaser
|
Removes rust, old coating, and oil
|
Masking
|
Silicone caps, plugs, high-temp tape
|
Keeps threads and bores clean
|
Hanging
|
C hooks, S hooks, wire
|
Holds parts and carries the ground
|
Application
|
Powder gun, hopper, grounding clamp
|
Charges and delivers the powder
|
Air
|
Compressor with filter and dryer
|
Moves powder without moisture
|
Cure
|
Dedicated electric curing oven
|
Melts and hardens the powder
|
Safety
|
Respirator, glasses, gloves, extinguisher
|
Protects you and your garage
|
Notice what's not on the list: a spray booth. Hobby volumes can work with a controlled corner of the garage, though a booth is worth considering as your projects grow. More on that in the spray area section below.
Not sure which oven size fits your parts and your garage power?
Our team at Creative Coating Solutions helps home and hobby coaters match an electric curing oven to their largest parts and their available power.
|
The Gun and the Compressor
Most home users start with a corona gun. It puts a charge on the powder, usually somewhere between 60 and 90 kV, so the particles wrap onto a grounded part. Lower the kV for parts with tight corners and recesses. High voltage in those areas pushes powder away instead of into them (that's the Faraday cage effect, and it's why beginners end up with bare inside corners).
Look for a gun that comes with a hopper, a few nozzle shapes and a ground wire. Our powder application equipment page lists mini hoppers and entry-level corona setups, plus pro-level options when you're ready to scale.
What about the compressor?
Good news. Powder spraying doesn't need a huge machine. A modest compressor handles it fine. What matters is the air itself:
- Dry. Moisture clumps powder and causes spitting.
- Oil-free. Oil causes craters in the cured finish.
- Regulated. You'll tune pressure at the gun for a soft, even cloud.
Add a water separator and a desiccant dryer after the compressor. Skip that step and you'll blame your gun for problems the air caused.
The Curing Oven: Where Home Setups Succeed or Fail
Here's the thing. You can fake nearly every other part of this setup. You can't fake the oven.
Can you use your kitchen oven? No. Powder releases fumes while it cures, and residue ends up on the walls. Food and powder coating don't share an oven. Period.
Standard polyester powder cures at 375 to 400°F for 10 to 15 minutes, counted from the moment the metal itself reaches that temperature. Total time in the oven is usually 25 to 45 minutes, because thick parts take a while to heat through. Some powders cure anywhere from 325 to 450°F, so always check the data sheet.
What to look for in a home-friendly oven:
- Interior size that fits your parts. Measure your biggest project, then add room for air movement. A 3x3x3 or 3x3x5 covers wheels, brackets, and small frames. A 4x4x4 or larger opens up motorcycle and bumper work.
- Electric heat. Our electric powder coating ovens run on 208V to 240V power, with PID controllers that hold temperature steady.
- Rated to 450°F. That leaves headroom above normal cure temps.
- Proper power. A 240V oven needs a dedicated circuit. Have a licensed electrician check your panel and wiring before it arrives.
Our economy electric ovens are built to order, and lead time is usually 4 to 5 weeks. Plan your garage layout while you wait.
Not sure whether you need a curing oven or a full powder coat oven? Our post on curing oven vs. powder coat oven breaks down the difference.
Quick tip: Stick a thermocouple or infrared thermometer on the part itself. Air temperature isn't part temperature, and that gap causes under-cured, soft finishes.
Surface Prep and Masking
Powder sticks to clean metal and slides off dirty metal. Simple as that.
A typical prep sequence looks like this:
- Degrease the part.
- Strip off old paint or rust.
- Blast it for a uniform profile, around 1 to 3 mils.
- Blow it off with clean, dry air.
- Handle it with clean gloves from here on.
For blasting, a cabinet keeps the mess contained and the media reusable. Aluminum oxide in 80 to 100 grit is a common choice for steel. Have a look at our abrasive blast cabinets and portable abrasive blasters, then read our guide to choosing a media blaster for your powder coating shop if you're comparing options.
Masking protects threads, bearing seats, and ground points. Use masking supplies rated for cure temperatures. Our silicone caps are rated to 500°F and silicone plugs to 400°F, so they ride through a normal cure without melting. Regular painter's tape won't survive.
Why does powder coating peel?
Nine times out of ten, it's prep. Oil, rust, or moisture left on the part keeps the powder from bonding. Under-curing is the second most common cause. For a troubleshooting reference, read our post on common powder coating defects and how to fix them.
Wondering whether a blast cabinet or a portable blaster suits your space?
Our team at Creative Coating Solutions helps hobbyists choose prep equipment based on part size, media type and workshop room.
|
Hanging Parts, Grounding, and Your Spray Area
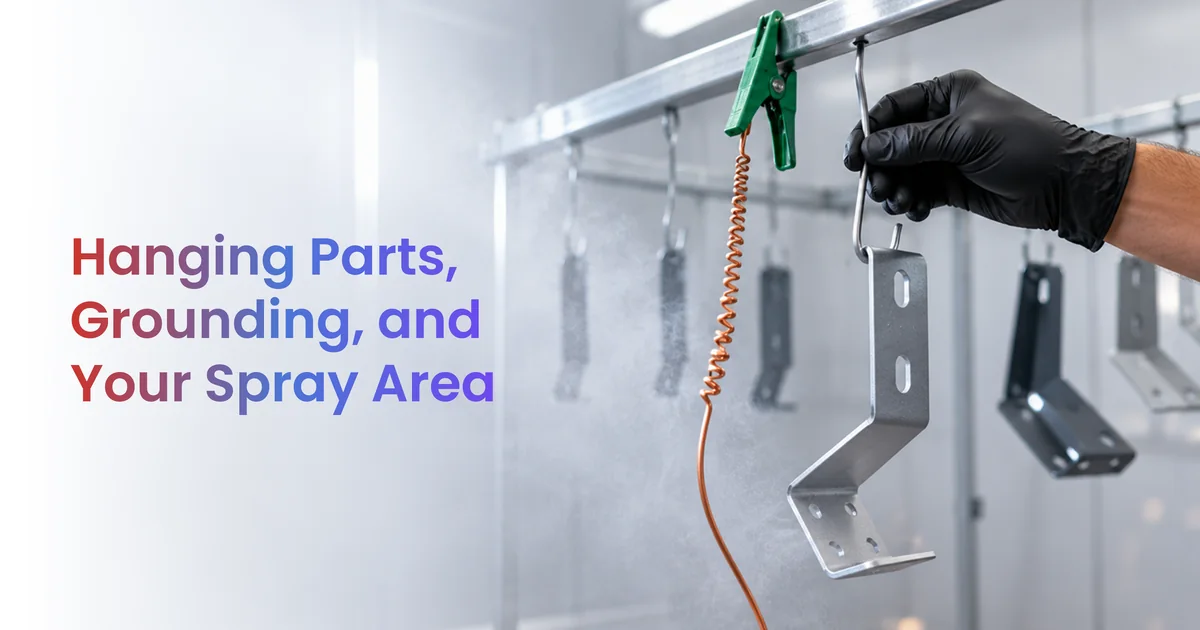
Hooks do two jobs. They hold the part, and they complete the electrical path to ground. A bad ground is the number one reason powder won't wrap properly.
- Use C hooks and S hooks sized for the part's weight.
- Scrape contact points clean, since cured powder on a hook blocks the ground.
- Ground your hanging rack to a proper earth ground, then test it.
- Keep a spare set of hooks. You'll bake coating onto them quickly.
Your spray area doesn't need to be fancy, but it does need airflow and a clean floor. Powder drifts, and a cluttered garage collects it. Hang plastic sheeting or clear a dedicated corner. As volume grows, look at a powder spray booth with filtered airflow. Commercial booths follow NFPA 33 guidance, which calls for about 60 feet per minute of airflow across the opening for powder. At home, you won't match that, so keep batches small and ventilate well.
Safety Gear and Rules for Powder Coating at Home
Powder is fine dust. Fine dust in the air is a health risk and a fire risk. Take this part seriously.
Wear:
Do:
- Keep ignition sources, including pilot lights and space heaters, away from the spray zone.
- Keep a rated fire extinguisher within reach.
- Place the oven away from where you spray, with room around it.
- Never leave a running oven unattended.
Check your local rules before you start. Some towns restrict home finishing, and some insurers want to know about it. A call to your local fire marshal and your insurance agent takes ten minutes and could save you a headache. Browse our industrial safety supplies for gear that fits.
Your First Home Setup in 7 Steps
- Confirm your space and power. Measure the garage, check for a 240V circuit, and call your electrician.
- Size your oven. Pick one that fits your largest planned part with room to spare.
- Set up air. Compressor, filter, water separator, and dryer, in that order.
- Build your prep station. Blast cabinet or blaster, degreaser, clean gloves.
- Gather masking and hooks. Caps, plugs, tape, plus plenty of hooks.
- Get safety gear in place. Respirator, extinguisher, ventilation.
- Run a test piece. Coat scrap steel first, tune your kV and cure time, then move on to real parts.
Most people finish their first test piece in a single afternoon. Expect a couple of rejects. That's normal.
Stuck on a choice? Talk to our team and we'll help you size the setup around your projects. If you're growing from hobby into paid work, our guide to choosing powder coating equipment for small and mid-size shops is the next read.
Conclusion
Powder coating at home comes down to five parts done properly: a gun, clean air, a dedicated oven, solid prep and the right safety gear. Get the oven and the prep right and the rest falls into place.
Start small, run test pieces and keep notes on your gun settings and cure times. Before anything gets plugged in, have your electrician review the power and check with your insurer. Then build from there.
Ready to put your setup together? Shop our powder coating equipment or reach out to our team and we'll point you to the right gear for your garage.
FAQs
What equipment do I need to powder coat at home?
You need a powder gun with a hopper, a compressor with air filtration, a dedicated electric curing oven, prep tools like a blast cabinet, high-temp masking supplies, hooks, and safety gear. Add a ground connection and a clean spray area. Everything else is an add-on you can pick up later as your volume grows.
Can I use my kitchen oven to cure powder coating?
No. Powder gives off fumes while it cures and leaves residue inside the oven. That's unsafe for an oven used for food. Use a dedicated electric curing oven instead, ideally one that runs on its own circuit and sits away from your living space.
What size compressor do I need for powder coating?
A small to mid-size compressor is enough, because powder spraying uses low air volume. What matters more is air quality. You need dry, oil-free air with a filter and a water separator, or moisture and oil will cause clumping, spitting and craters in the finish.
What temperature and time do you cure powder coating?
Many standard polyester powders cure at 375 to 400°F for 10 to 15 minutes after the part itself reaches temperature. The full oven cycle often runs 25 to 45 minutes. Some formulas cure between 325 and 450°F, so follow the powder manufacturer's data sheet.
Is powder coating at home safe?
It is safe when you manage the risks. Powder is a combustible dust, so wear a respirator, keep ignition sources away, ventilate the area and keep a fire extinguisher close. Also check local rules, insurance requirements and electrical capacity before you install an oven.
Do I need a blast cabinet to powder coat at home?
You don't strictly need one, but it helps a lot. Powder only bonds to clean, profiled metal. A blast cabinet strips rust and old coatings fast and leaves a uniform surface, which gives you a finish that lasts longer than hand sanding.
How big should my home powder coating oven be?
Measure your largest part and add room for airflow around it. A 3x3x3 or 3x3x5 suits wheels, brackets, and small frames. A 4x4x4 or larger suits bumpers, motorcycle frames and bigger projects. Buying slightly bigger than you need is easier than outgrowing a small oven.