Most powder coating defects, including orange peel, fisheye, and Faraday caging, trace back to one of three stages: surface prep, gun settings, or oven curing temperature. Identify which stage caused the defect, then correct that specific variable. Adjusting everything at once makes it harder to find the actual problem.
You pull a part out of the oven and the surface looks like the skin of an orange instead of the smooth finish you were going for. Or there are small craters scattered across it. Or the powder just didn't reach that recessed corner no matter how many times you went over it.
Sound familiar? Every shop deals with this. The frustrating part isn't that defects happen. It's that most troubleshooting guides tell you what a defect looks like without telling you where in your process it actually started.
Powder coating defects almost always trace back to one of three places: your part prep, your gun settings, or your oven. Once you know which stage caused the problem, fixing it stops being a guessing game. We sell the powder coating equipment that touches all three stages, and we see these issues from the equipment side more than most.
A powder coating defect is any visible or structural flaw, like uneven texture, poor adhesion, or bare spots, that shows up after curing. Defects happen when contamination, incorrect gun settings, or improper oven temperature disrupt how the powder flows and bonds during application or curing. Most defects are preventable when you identify which process stage caused them.
Key Takeaways
- Powder coating defects trace back to three stages: surface prep, application, or curing. Not random bad luck.
- Orange peel usually points to incorrect gun voltage, distance, or oven temperature being off the powder manufacturer's spec.
- Faraday cage effect worsens with higher gun voltage on recessed parts, which is the opposite of most operators' first instinct.
- Fisheye and cratering almost always trace back to contamination, such as oil or moisture, not bad powder quality.
- A curing oven's dial reading correctly does not guarantee the interior is holding that same temperature throughout the full cycle.
The Three Zones Where Defects Start
Before you touch a single setting, figure out which zone your defect came from.
This matters because the fix is completely different depending on where in the process the problem started. Adjusting your gun when the issue is actually your compressed air line wastes time and doesn't solve anything.
Zone 1 – Prep: Defects that show up as adhesion failures, peeling, or fisheye usually start before the gun ever fires. Oil, moisture, or surface contamination on the part carries through the entire process and shows up after cure.
Zone 2 – Application: Texture defects like orange peel, bare spots, or uneven coverage point to gun settings, distance, voltage, or technique during the coating pass.
Zone 3 – Curing: Gloss inconsistency, color variation, hardness issues, and some forms of orange peel come from the oven. If your oven isn't hitting or holding the powder manufacturer's spec, you'll see it in the finish.
Shops across the USA running production work deal with all three zones. But most repeat defects trace back to one of them consistently, and once you identify which one, you can fix it once instead of troubleshooting it every batch.
What are the most common powder coating defects?
The most common powder coating defects are orange peel, fisheye or cratering, Faraday cage effect on recessed parts, poor adhesion or peeling, and uneven coverage or bare spots. Each defect points to a specific zone in the process: prep, application, or curing. Identifying the zone first makes troubleshooting faster and prevents the same defect from repeating on the next batch.
Read More About: How to Choose Powder Coating Equipment for Small and Mid-Size Shops | Powder Coating vs Paint: Which Finish Lasts Longer?
Orange Peel: What It Is and How to Fix It
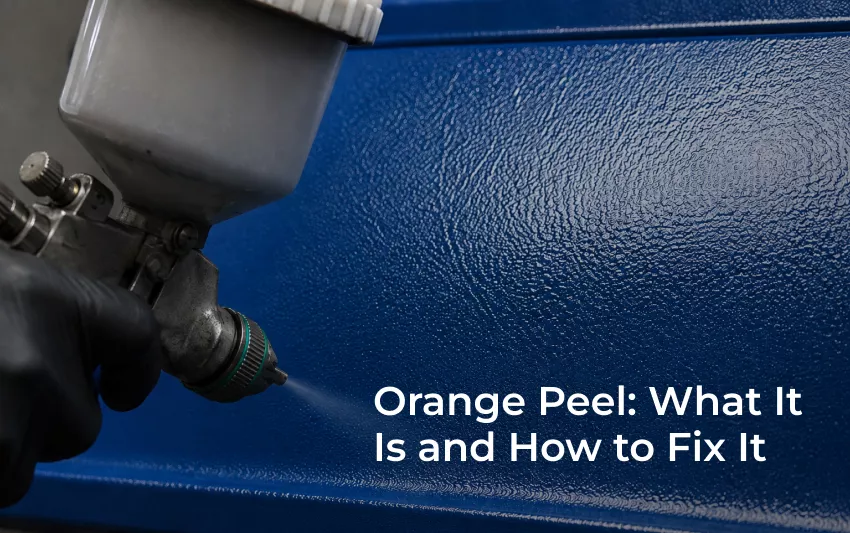
Orange peel is the most frequently reported finish problem in powder coating shops. The surface looks bumpy and textured, like the skin of an orange, instead of smooth and glossy.
It typically traces back to one of three causes:
Gun voltage or distance is off – Too much voltage causes back ionization where the part rejects excess charge. Too little and the powder won't adhere uniformly. The standard starting range for corona guns is 60-90 kV at 6-10 inches from the part surface, but check your specific powder manufacturer's recommendation first.
Film thickness is too high – A coat that's applied heavier than the powder spec calls for takes longer to flow out during cure. The surface texture locks in before it has a chance to level. Thin it back before adjusting anything else.
Oven temperature is off spec – Even a 10-15 degree difference from the powder manufacturer's recommended cure temperature affects how the finish flows and levels. The dial reading isn't always the temperature inside the oven.
Fix: Start with your gun distance and voltage, check actual oven temperature with a probe or data logger, and verify your film thickness against spec before adjusting anything else. Change one variable at a time.
Fisheye and Craters: The Contamination Problem
Small round dimples or craters scattered across your finish, sometimes called fisheye, are almost always a contamination issue. The defect shows up after curing, but it started before the part ever went in the booth.
Common contamination sources:
- Oil or fingerprints on the substrate that weren't fully removed during cleaning
- Silicone from mold releases, polishes, or nearby products drifting into the booth
- Moisture in the compressed air line from a missing or clogged coalescing filter
- Residue left inside the powder gun or hopper from a previous batch
- Contaminated blast media being recycled through without inspection
Fix: Degrease and clean the part thoroughly before coating. Check your compressed air for oil using a clean white cloth held at the air outlet for 30 seconds. Clean your gun and hopper regularly, and replace your spray booth filters on a set schedule rather than waiting for visible clogging.
Contamination-related defects repeat on every batch until you find the source. The part and the equipment both need to be clean, not just one or the other.
Why does my powder coating have craters after curing?
Craters after curing almost always trace back to contamination. Oil, silicone, or moisture on the part surface or inside your equipment prevents the powder from bonding cleanly during application, and the defect becomes visible after the oven cycle. Check the part prep, your compressed air line for oil contamination, and your powder gun and hopper for residue from previous batches before adjusting any application settings.
Faraday Cage Effect: Why High Voltage Makes It Worse
Faraday cage effect is what happens when powder won't reach into recessed areas, corners, or hollow sections of a part. The electrostatic field gets blocked by the part's own geometry before it can push powder into the deep spots.
Here's the part that surprises most operators: increasing your gun voltage to force powder into recesses typically makes the problem worse, not better.
At high kV settings, a corona gun generates far more free ions than the powder can actually pick up, and only a small share of the total ions generated end up charging powder particles. Technical literature on corona charging puts the share of ions that effectively charge powder in the single digits to low double digits, with the rest becoming free ions. Those excess free ions build an electrostatic barrier around recessed areas that actively repels incoming powder rather than pulling it in.
Fix: Lower your gun voltage, typically toward 40-50 kV for parts with deep recesses or complex geometry. Use a slotted tip to concentrate spray into corners. Make multiple lighter passes at a closer distance, roughly 4-6 inches, instead of one heavy pass from farther back. Preheating the part to around 90°F before spraying can also help powder reach and grip in tight areas.
For parts with very deep recesses that consistently cause coverage problems, tribo charging technology avoids the free-ion buildup that causes the cage effect in the first place, since it charges powder through friction rather than a high-voltage field. If persistent Faraday cage issues are limiting your production on complex parts, ask our team whether a tribo setup makes sense for your part mix before you invest in one.
Get the Right Application Equipment
Talk to Our Team About Gun Settings, Upgrades, or Replacement Parts.
|
Poor Adhesion and Peeling: Almost Always Prep
If your coating chips, peels, or flakes off after cure, the problem almost always started before the gun came out.
Adhesion failures trace back to one of these prep issues:
- Residual oil or machining lubricant on the substrate that looks clean but isn't
- Rust or mill scale that wasn't fully removed during blasting
- Skipped or inadequate chemical pretreatment before coating
- Parts that weren't fully dry before coating began
A part that looks visually clean to the eye can still have enough surface contamination to cause adhesion failure across the whole coating. The coating has nothing clean to bond to.
Fix: Don't skip degreasing, even on parts that came from your own blast cabinet. On steel parts headed outdoors or into demanding service conditions, a phosphate or iron pretreatment stage before coating makes a measurable difference in long-term adhesion. Verify your abrasive blasting equipment is producing the right surface profile for powder coating, and confirm parts are fully dry before they go in the booth.
If a specific part type keeps failing adhesion consistently, the prep process for that material or geometry needs to change, not the gun settings.
How do you fix poor adhesion in powder coating?
Poor adhesion in powder coating almost always traces back to inadequate surface preparation. Strip the coating from the affected part, reclean and degrease thoroughly, verify your blast profile, and apply a chemical pretreatment stage if you're not already using one. Check that parts are fully dry before coating. Adhesion failures rarely come from incorrect gun settings and are more likely to repeat until the prep process is corrected at the source.
How to Diagnose a Defect Step by Step
Work through this in order. Don't skip to step 3 without checking steps 1 and 2 first.
Step 1 – Identify the defect type. Is it a texture problem (orange peel, uneven surface)? An adhesion problem (peeling, flaking)? A coverage problem (bare spots, thin areas)? Each type points to a different zone.
Step 2 – Check the part before blaming equipment. Was it fully degreased and dry before coating? A contaminated part will produce defects regardless of how well the equipment is set up.
Step 3 – Verify gun settings against the powder spec. Voltage, distance, and flow rate should match the powder manufacturer's recommendation. Not a setting you've always used. Not a gut feeling. The spec sheet.
Step 4 – Confirm actual oven temperature. Use a temperature data logger or probe during a full cure cycle. Your curing oven dial reading correctly doesn't mean the interior is holding that temperature uniformly across the whole chamber.
Step 5 – Inspect equipment for contamination. Check gun tips, hoses, and compressed air lines for oil, moisture, or old powder buildup. Worn gun tips cause more repeat defects than most shops account for.
Step 6 – Retest one part before running the full batch. Confirm the fix worked on a single part before committing more material and oven time to the whole production run.
How do I know if my oven is causing powder coating defects?
Use a temperature data logger or probe placed inside the oven during a complete cure cycle to confirm it's actually holding the temperature it reports throughout the run. A dial reading accurately at the controller doesn't guarantee the oven interior matches it, especially in older equipment or units with airflow issues. Temperature variation of 10-15 degrees from spec is enough to cause orange peel, gloss inconsistency, or hardness problems on finished parts.
Want This Handled For You? If you've run through these checks and you're still seeing the same defect on every batch, it may be aging equipment rather than a settings issue. Our team stocks the powder coating supplies and replacement parts shops across the USA need to fix recurring problems fast. Get a Free Quote
Conclusion
Powder coating defects aren't random, even when they feel that way in the middle of a production run.
Orange peel, fisheye, Faraday cage effect, adhesion failure: every one of them traces back to prep, application, or curing. Once you know which zone it started in, the fix usually isn't complicated. And catching it once costs less than recoating the same parts batch after batch while you adjust settings without knowing what's actually wrong.
The habit worth building is checking the part and the equipment before touching a dial. Most repeat defects trace back to something specific: an unclean gun, a compressor pulling in oil through a worn filter, an oven that's drifted out of calibration. Work through prep, then gun settings, then oven temperature in that order, and you'll isolate the cause faster than guessing at a fix.
Creative Coating Solutions ships powder coating equipment, replacement parts, and supplies across the USA from Fenton, Missouri. We stock what production shops actually need to fix recurring defects, and we'd rather help you find the right replacement part than sell you equipment you don't need.
If you're stuck after working through these checks, call us at (618) 741-0740 or email scott@creativecoatingsolutions.com and tell us what you're seeing.
Request a Free Quote or Consultation
FAQs
What causes orange peel in powder coating?
Orange peel comes from incorrect gun voltage or distance, film thickness that's too high for the powder spec, or oven temperature that's off from the manufacturer's recommendation. Check gun settings and film thickness first, then verify actual oven temperature with a probe before adjusting anything else. Changing multiple variables at once makes it harder to identify which one was the actual cause.
How do you fix Faraday cage effect on recessed parts?
Lower your gun voltage, typically toward 40-50 kV for complex geometry, and use multiple lighter passes at a closer distance of around 4-6 inches instead of one heavy pass from farther back. High voltage worsens the Faraday cage effect by generating excess free ions that block powder from reaching recessed areas. A slotted gun tip and preheating the part to around 90°F before spraying can also help.
Why does my powder coating have small craters or fisheye?
Craters and fisheye almost always trace back to contamination, whether that's oil or moisture on the part, silicone contamination drifting into the booth, or oil from a worn coalescing filter in the compressed air line. Clean the substrate thoroughly, check your air supply for contamination, and inspect your gun and hopper for residue before adjusting any gun settings.
Does Creative Coating Solutions sell powder coating troubleshooting support across the USA?
Yes. Creative Coating Solutions is a veteran-owned supplier based in Fenton, Missouri that stocks powder coating guns, curing ovens, spray booths, and replacement parts for shops across the USA. Our team helps diagnose whether a defect is coming from equipment, settings, or prep before recommending new parts or upgrades. Call (618) 741-0740 or email scott@creativecoatingsolutions.com.
Why does powder coating keep peeling off after curing?
Powder coating peels after curing almost always because of inadequate surface preparation before coating. Residual oil, insufficient blast profile, or skipped pretreatment steps prevent the powder from bonding properly to the substrate. Even a part that looks visually clean can have surface contamination that causes adhesion failure. Strip the part, reclean with a proper degreaser, verify your blast process, and add a pretreatment stage if you're not already using one.
How often should I clean my powder coating gun?
Clean your gun between color changes and any time you notice inconsistent flow or texture in your finish. Dirty guns are a common source of repeat contamination-related defects like fisheye. Gun tips are wear items that need regular inspection and replacement, and a worn tip is often the real cause behind defects that shops assume are settings problems. We stock replacement gun parts and consumables that ship fast across the USA.
Can a powder coating defect be fixed without stripping and recoating?
For cosmetic surface flaws, targeted touch-up methods sometimes work on low-visibility areas. But for structural adhesion problems or defects across a significant surface area, stripping and recoating typically gives better long-term results and is often faster than trying to patch a defect cleanly. The strip and recoat process also gives you the chance to correct the prep issue that caused the original defect.
What's the difference between a prep defect and an application defect in powder coating?
Prep defects, like poor adhesion or fisheye, originate before coating begins, typically from contamination or inadequate surface preparation. Application defects, like orange peel or uneven coverage, originate during the coating pass from gun settings or technique. Curing defects, like gloss inconsistency or hardness issues, come from the oven. Identifying which category your defect falls into points you to the right fix immediately.